 Save to Pinterest
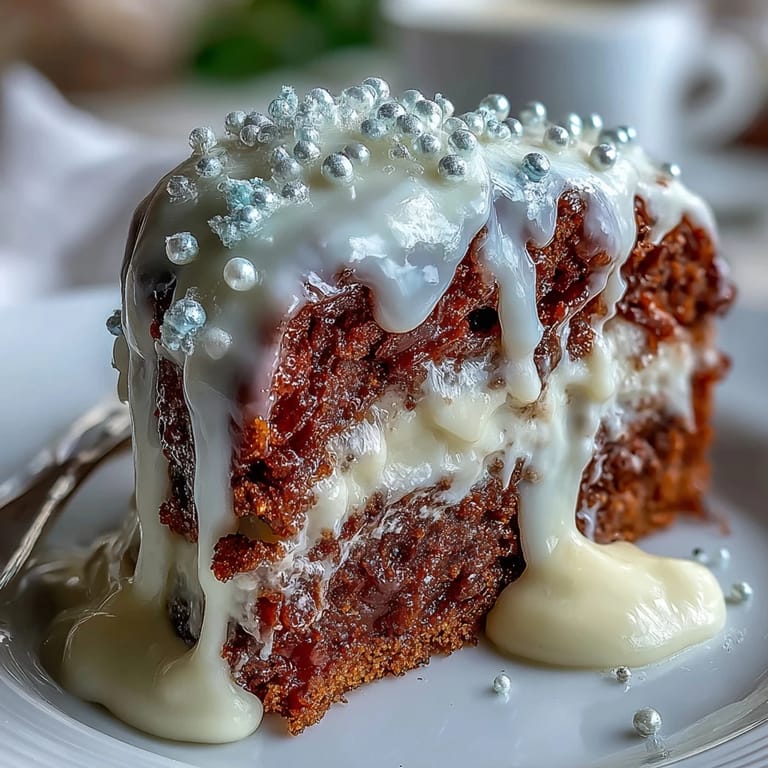
 My sister called me three weeks before her daughter's First Communion with a nervous laugh—she needed a cake that looked like it came from a fancy bakery but tasted like love. I'd never worked with fondant before, but something about the weight of that moment, the significance of a child's milestone, made me want to try. That first time rolling out the pearl-white fondant, my hands were shaking a little, worried I'd mess it up. But then it draped over the cake like silk, and suddenly I understood why people become obsessed with decorating cakes. This recipe has become my go-to for celebrations that need to feel special.
I'll never forget my niece's face when she saw her cake at the reception—the way her eyes went wide, like she couldn't believe something so elegant was made by her aunt in a regular kitchen. Her friends crowded around asking where we'd ordered it from, and watching my sister's proud smile made every moment of fondant wrestling worthwhile. That's when I realized this cake isn't really about the decorating; it's about showing up for someone with something that took time and care.
Ingredients
- All-purpose flour (3 cups): The foundation of a tender crumb—don't skip sifting or whisking it with the baking powder and salt, as it distributes the leavening evenly.
- Baking powder (2½ tsp): This is what gives the cake its gentle rise and tender texture; stale baking powder is your silent enemy, so check the date.
- Granulated sugar (2 cups): Creamed with butter until fluffy, this creates air pockets that make the cake light rather than dense.
- Unsalted butter (1 cup for cake, 1 cup for frosting): Room temperature butter is non-negotiable—cold butter won't cream properly and you'll end up with a grainy batter.
- Eggs (4 large, room temperature): Temperature matters here; cold eggs won't incorporate smoothly into the batter and can create a lumpy texture.
- Pure vanilla extract (1 tbsp): Use the real thing, not imitation—the flavor difference is noticeable and worth it on a cake this special.
- Whole milk (1¼ cups): The moisture that keeps this cake tender for days; whole milk adds richness that lower-fat versions can't match.
- Powdered sugar (4 cups for frosting): Sift it before using to avoid lumps that will show through the fondant.
- White ready-to-roll fondant (2 lbs): This is your decorating magic—it's easier to work with than homemade fondant and gives a perfectly smooth finish.
- Pearl luster dust: A tiny brush and a light touch is all you need; less is more, as it's easy to overdo and make the cake look heavy.
Tired of Takeout? 🥡
Get 10 meals you can make faster than delivery arrives. Seriously.
One email. No spam. Unsubscribe anytime.
Instructions
- Get your mise en place ready:
- Preheat the oven to 350°F and prepare your half-sheet pan by greasing it thoroughly and lining with parchment paper—this prevents sticking and makes cleanup easier. Have all your ingredients at room temperature and measured out before you start, because once you begin mixing, you're working against time and temperature.
- Mix your dry ingredients:
- Whisk together the flour, baking powder, and salt in a medium bowl—this distributes the leavening evenly and aerates the flour slightly. Set it aside and forget about it for now.
- Cream the butter and sugar:
- In a large bowl or stand mixer, beat the softened butter and granulated sugar together for about three minutes until it's light, fluffy, and pale—this is where the magic of air incorporation happens. You should be able to see a visible change in color and texture.
- Add eggs one by one:
- Add each egg individually, beating well after each addition to ensure it's fully incorporated before adding the next one. If the mixture looks slightly curdled or separated, that's okay—it will come together once you add the dry ingredients.
- Fold in the vanilla:
- Mix in the vanilla extract, then alternate adding the flour mixture and milk in three additions, starting and ending with flour. Stir just until combined—overmixing develops gluten and creates a tough, dense cake.
- Bake until golden:
- Pour the batter into your prepared pan and smooth the top gently with a spatula. Bake for 30 to 35 minutes until a toothpick inserted in the center comes out clean and the edges are just starting to pull away from the sides of the pan.
- Cool with patience:
- Let the cake cool in the pan for 10 minutes, then turn it out onto a wire rack to cool completely—this takes about an hour, and rushing this step can result in a warm cake that tears when you frost it. Make yourself a coffee; this is the perfect time to breathe.
- Prepare your buttercream:
- Beat the softened butter until creamy, then gradually add the sifted powdered sugar along with milk, vanilla, and a pinch of salt. Beat until smooth and fluffy—this frosting is your adhesive base for the fondant and needs to be perfectly even.
- Frost the cake:
- Once the cake is completely cool, spread a thin, even layer of buttercream over the entire surface and sides using an offset spatula. This layer doesn't need to be thick—it just needs to be smooth enough for the fondant to adhere.
- Roll out your fondant:
- Dust your work surface lightly with powdered sugar and roll out the fondant to about 1/8-inch thickness—it should be large enough to drape over your entire cake with a bit of overhang. If it cracks at the edges, that's normal and easily smoothed away.
- Drape and smooth:
- Carefully drape the fondant over the cake, starting from the center and smoothing outward and downward with your hands or a fondant smoother. Work slowly and gently—fondant is forgiving, and any wrinkles can be smoothed away with a little patience and a lightly dampened hand.
- Trim and finish:
- Trim away excess fondant at the base using a sharp knife, then brush lightly with water where you want to place edible pearls or decorative elements. Dust the surface with pearl luster dust using a dry food-safe brush in light, sweeping motions.
- Add shine and details:
- If desired, lightly brush a mixture of corn syrup and water over the fondant for extra shine, then arrange edible pearls to create your Communion motif—whether that's a cross, chalice, or elegant border. Let the cake set for at least 30 minutes before serving.
 Save to Pinterest
 What struck me most was realizing that a celebration cake isn't really about perfection—it's about intention. My fondant had one tiny bubble that I almost panicked about, but it disappeared once the pearl dust caught the light. That small imperfection made me feel less like I was faking expertise and more like I was authentically present for someone I love.
The Buttercream Secret
I learned the hard way that buttercream consistency matters enormously when you're working with fondant. Too soft, and the cake gets squirmy as you try to smooth the fondant; too stiff, and you can't spread it evenly. The sweet spot is when it's fluffy enough to hold peaks but soft enough to spread like butter on warm toast. If yours is too thick, add milk a teaspoon at a time; if it's too soft, refrigerate it for 15 minutes and try again.
Working with Fondant Like a Human
Fondant has a reputation for being intimidating, but I've found it's actually more forgiving than people think. It's basically marshmallow dough—you can stretch it, smooth it, even tear it and stick it back together with a tiny bit of water. The one thing that trips people up is thinking it needs to be perfect on the first try. It doesn't. If you get a wrinkle, smooth it out. If it tears, patch it. Work slowly and trust that your hands know what to do.
Decorating Touches That Matter
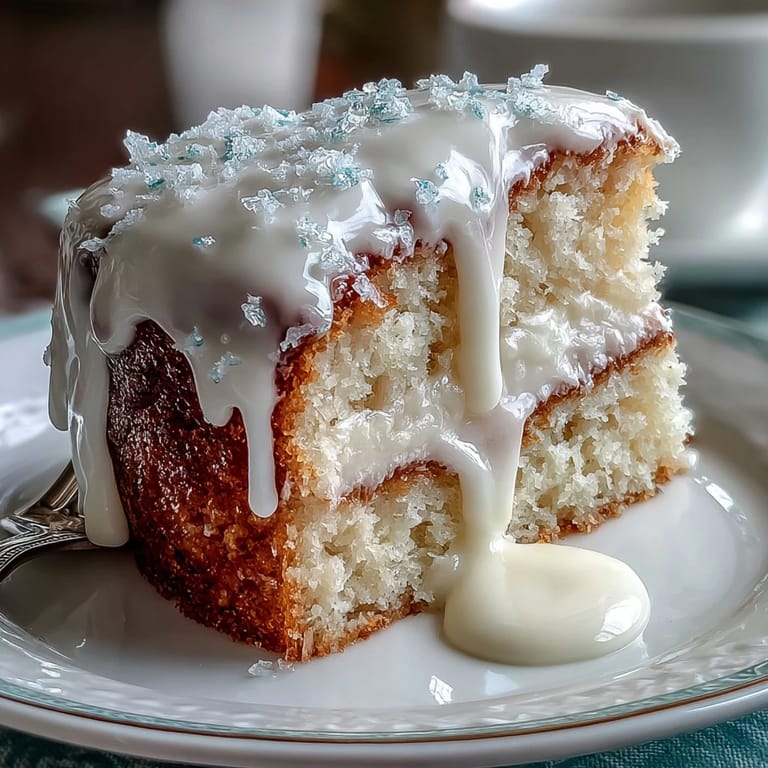
I've discovered that the pearl luster dust is what transforms a fondant-covered cake from looking homemade to looking like it came from a fancy patisserie. A light dusting catches the light and creates dimension that makes people lean in closer. The edible pearls are optional, but they add a meaningful symbolic element—whether you arrange them as a cross, around the border, or in a pattern that has personal significance, they tell a story.
- Apply luster dust with a nearly dry brush and build the color gradually—it's easier to add more than to remove too much.
- Edible pearls work best when placed on a tiny dot of water or a smudge of buttercream peeking through the fondant.
- Let the cake set for at least 30 minutes before moving it, as fondant can be sticky and prone to fingerprints if rushed.
 Save to Pinterest
 This cake has taught me that celebration baking is less about being a perfectionist and more about being someone who shows up with something beautiful. Make it for someone special, and the imperfections will be invisible because they'll be too busy feeling loved.
Recipe Q&A
- → What type of fondant is used for decoration?
White ready-to-roll fondant is used, dusted with pearl luster dust and optionally adorned with edible sugar pearls for an elegant finish.
- → How do you ensure the fondant adheres well to the cake?
A smooth layer of vanilla-flavored buttercream is spread over the cooled cake, providing a sticky surface that helps the fondant cling securely.
- → Can I substitute almond extract for vanilla?
Yes, for a lighter flavor, almond extract can replace half of the vanilla extract without affecting the texture.
- → What is the best way to store the cake before serving?
Once decorated, cover the cake loosely and keep it at room temperature if serving within a day, or refrigerate tightly wrapped to preserve freshness longer.
- → Does this cake accommodate dietary restrictions?
This version is vegetarian but contains gluten, dairy, and eggs; fondant may have traces of nuts, so check ingredient labels if allergies are a concern.
- → What pairing enhances the cake’s flavor?
Serving with fresh berries, fruit coulis, or a glass of Moscato or Riesling enriches the tasting experience.