 Save to Pinterest
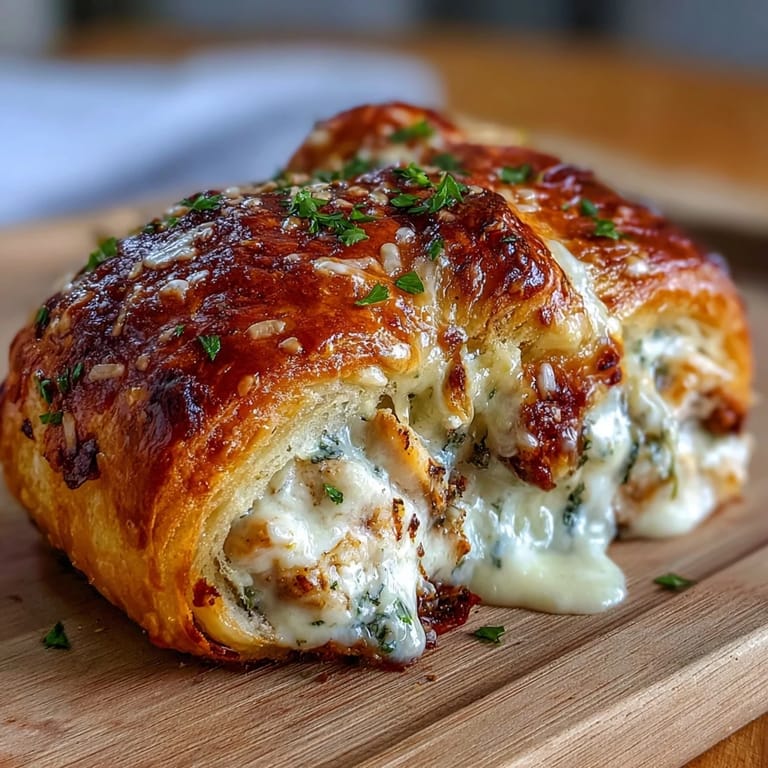
 My sister called me in a panic one Tuesday evening, asking if I could throw together something impressive for her book club that night. I had chicken in the fridge, crescent rolls in the freezer, and about forty minutes to make magic happen. What emerged from my oven were these golden, pillowy parcels of cheesy chicken that somehow felt both effortless and elegant, the kind of dish that makes people think you've been in the kitchen for hours when really you've just borrowed a little baker's shortcut.
What I didn't expect that night was how quiet the room got when everyone took their first bite. My sister's friend Sarah, who's usually pretty chatty, just closed her eyes and smiled. That's when I realized these weren't just convenient—they hit that perfect sweet spot where comfort and sophistication actually meet on the same plate.
Ingredients
- Cooked chicken (2 cups, shredded): Use rotisserie chicken if you want to skip the cooking step entirely; it adds a deeper, smokier flavor that's honestly worth the splurge.
- Cream cheese (1 cup, softened): Let it sit out for thirty minutes before mixing so it blends smoothly without lumps hiding in your filling.
- Shredded mozzarella cheese (1 cup): The mild flavor lets the garlic shine, and it gets beautifully melty inside.
- Garlic powder (1 teaspoon): This is your seasoning anchor; don't skip it or swap it for fresh garlic in the filling itself.
- Dried Italian herbs (1 teaspoon): The blend of oregano, basil, and thyme ties everything together with subtle warmth.
- Salt and pepper: Taste as you go; the cheeses are already salty, so start conservative.
- Refrigerated crescent roll dough (1 package, 8-count): Keep it cold until the moment you unroll it, and work quickly so the dough doesn't warm up and become sticky.
- Unsalted butter (½ cup, melted): Unsalted gives you control over the final salt level in that gorgeous garlic sauce.
- Garlic cloves (2, minced): Fresh garlic in the sauce is where the magic happens; don't even think about using powder here.
- Grated Parmesan cheese (½ cup): Use the good stuff—the kind you grate yourself if you can—because it won't be buried under other flavors.
- Fresh parsley (1 tablespoon, chopped): This is your final flourish, adding color and a whisper of freshness that cuts through all that richness.
Tired of Takeout? 🥡
Get 10 meals you can make faster than delivery arrives. Seriously.
One email. No spam. Unsubscribe anytime.
Instructions
- Get your oven ready and set the stage:
- Heat your oven to 375°F and line a baking sheet with parchment paper; this prevents sticking and makes cleanup feel like a gift to your future self.
- Build the filling with confidence:
- Combine the shredded chicken, softened cream cheese, mozzarella, garlic powder, Italian herbs, salt, and pepper in a large bowl, stirring until everything is evenly distributed and creamy. Don't overmix or you'll toughen the filling, but do make sure there are no lonely pockets of cream cheese hiding in the corners.
- Prepare your dough:
- Unroll the crescent roll package and gently separate it into the eight distinct triangles; they should come apart almost eagerly if the dough is at the right temperature.
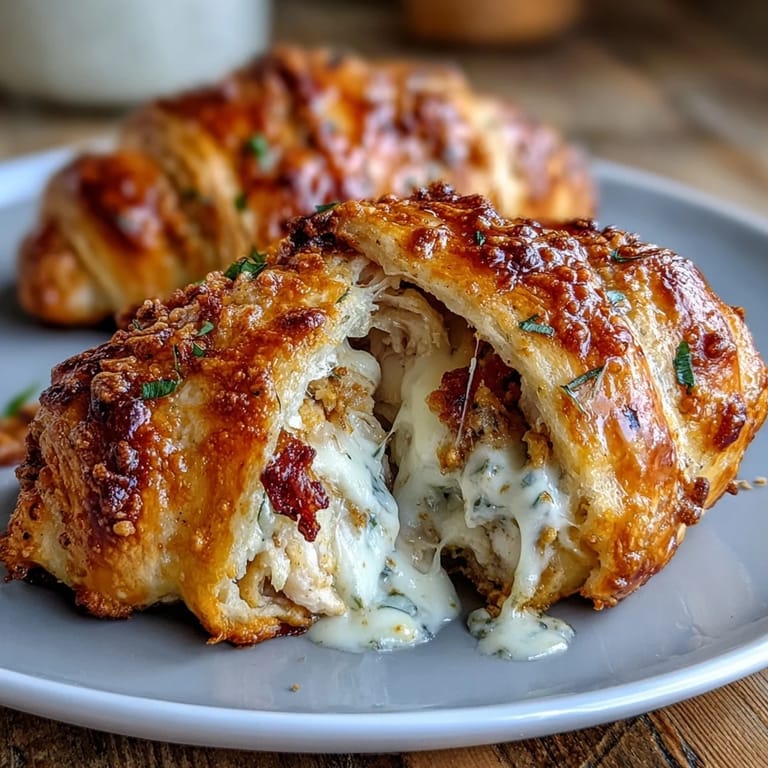
- Fill and seal each pillow:
- Spoon about two tablespoons of filling onto the wide end of each triangle, then fold the pointed end over to create a little packet and press the edges firmly to seal. The dough should envelop the filling without any gaps where steam can escape and dry things out.
- Arrange for even baking:
- Place your pillows on the prepared baking sheet with a bit of space between each one so heat can circulate and they can puff up evenly without touching.
- Make the garlic Parmesan coating:
- Whisk together the melted butter, minced fresh garlic, and grated Parmesan in a small bowl until combined; the garlic should be distributed throughout so every brush stroke carries that flavor.
- Brush generously:
- Using a pastry brush, coat the top of each pillow with the garlic butter mixture, making sure you cover every visible surface. This is where the golden color and irresistible aroma come from, so don't be shy.
- Bake until golden:
- Place in the preheated oven for 25 to 30 minutes, watching until they're puffed and deeply golden brown on top. You'll know they're done when they've risen and the color reminds you of burnished honey.
- Rest before serving:
- Let them cool for five to ten minutes straight from the oven; this firms up the filling slightly so it doesn't explode everywhere when you bite in.
- Finish with fresh parsley:
- Sprinkle the chopped parsley over the warm pillows just before serving, giving everything a final pop of color and a hint of herbaceous freshness.
 Save to Pinterest
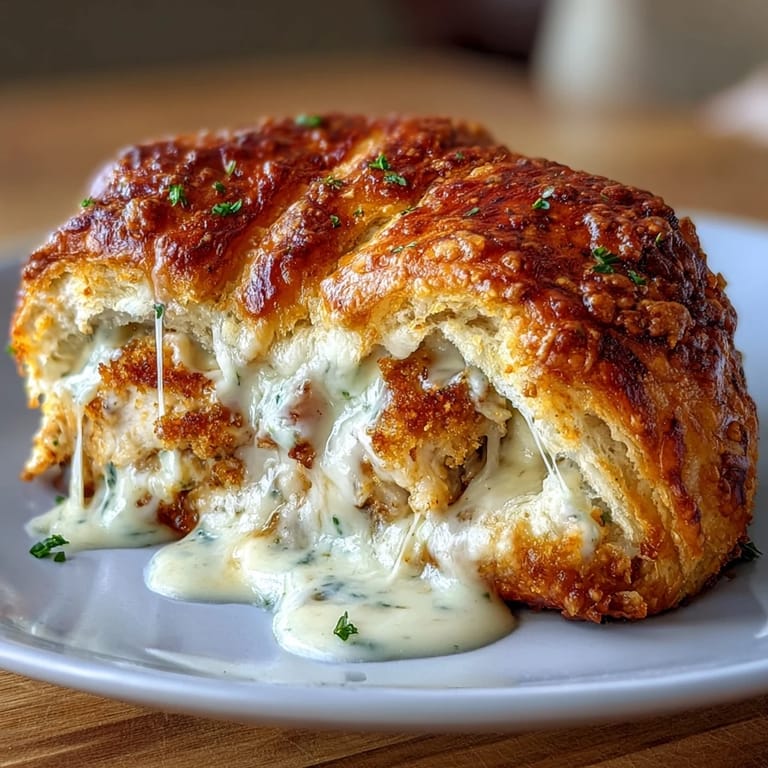
 Years later, those pillows became what my sister made whenever she wanted to remind me we were okay after a rough patch. Food has this strange power to say things words sometimes can't, and these simple little packages somehow carried more than just chicken and cheese.
Variations That Work
I've experimented with this recipe more times than I'd like to admit, each tweak teaching me something new. Spinach adds earthiness and color, sun-dried tomatoes bring a sweet tang, and once I even added crispy bacon bits because, well, bacon. The beauty of this recipe is its flexibility; the crescent dough and garlic butter sauce are sturdy enough to handle whatever direction your creativity pulls.
Serving Suggestions That Elevate the Moment
These pillows shine brightest when paired with something bright and fresh that cuts through the richness. A simple arugula salad with lemon vinaigrette, roasted green beans, or even steamed broccoli become partners rather than afterthoughts. I've also learned that serving these warm, straight from the oven, makes a difference you can actually taste.
Storage and Make-Ahead Magic
One of my favorite discoveries is that you can assemble these pillows hours ahead, cover them loosely with plastic wrap, and refrigerate until you're ready to brush and bake. The cold actually helps the dough hold its shape better during baking. You can even freeze them unbaked for up to a month, though you'll need to add five extra minutes to the baking time if you bake from frozen.
- Assembled pillows keep in the fridge for up to eight hours before baking, so prep during the day and bake at dinner time.
- Leftover baked pillows reheat beautifully at 350°F for about ten minutes, regaining their flakiness and warmth.
- Freezing unbaked pillows is your secret weapon for unexpected guests or when you need an impressive dinner but no time to fuss.
 Save to Pinterest
 There's something deeply satisfying about pulling these from the oven and watching people's faces light up at the table. They're proof that sometimes the most impressive meals come from the simplest combinations and a little bit of butter and garlic.
Recipe Q&A
- → Can I use rotisserie chicken for the filling?
Absolutely, rotisserie chicken adds extra flavor and convenience, making it a great substitute for cooked shredded chicken in the filling.
- → What dough options can I use besides crescent rolls?
Puff pastry or homemade dough can be used as alternatives for a similar flaky texture, though baking times may vary slightly.
- → How do I prevent the pillows from leaking during baking?
Sealing the edges firmly by pinching and ensuring the filling isn’t too moist helps prevent leaks while baking.
- → Can I prepare these pillows ahead of time?
Yes, you can assemble them and refrigerate before baking. Bake from chilled, adding a few extra minutes to the cooking time if needed.
- → What can I serve alongside the chicken pillows?
Side salads, steamed vegetables, or light grains complement the rich flavors and round out the meal nicely.
- → Is it possible to make a lighter version of this dish?
Using reduced-fat cream cheese and mozzarella lowers the richness while maintaining creamy texture and flavor.